
DIY Fall Pumpkin Wreath Instructions and Video Tutorial. Learn how to make this affordable and easy pumpkin wreath which will be sure to liven up any Autumn space!

This DIY Fall Pumpkin Wreath is an easy project that comes together in about 15 minutes. It is a very beginner friendly project.
Autumn is a wonderful time bring an element of coziness into your home. This DIY project is sure to do just by bringing a staple of fall into your home: Pumpkins! You will enjoy being greeted at your door by this adorable wreath all season long.
It is also very affordable. I made this project with things I had already collected throughout the years, but you can find similar affordable options here:
Red and Orange Velvet Pumpkins
Assorted Farmhouse Style Pumpkins
This post contains affiliate links for your shopping convenience, which means I make a small commission at no extra cost to you . Read the full disclosure here.

Watch the Video for the Easy and Affordable DIY Pumpkin Wreath Tutorial
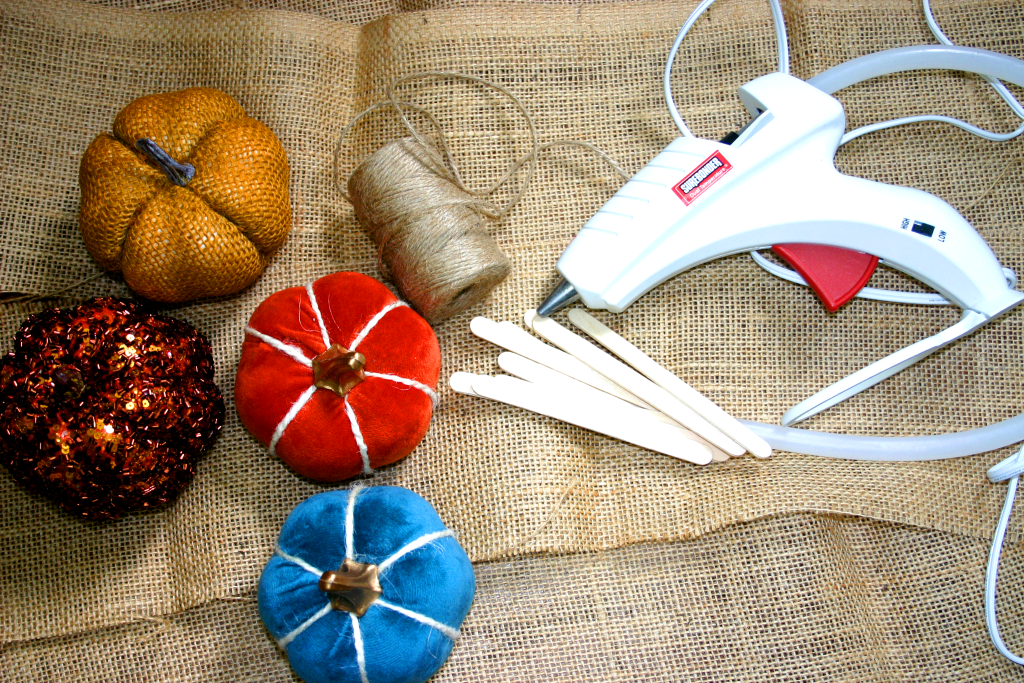
Materials for the Fall Pumpkin Wreath
- Decorative Pumpkins- I used 8 pumpkins, but you can use any amount. It just depends on how big or small you want your wreath to be.
- Popsicle sticks
- Hot glue gun
- Hot glue sticks
- Twine
- Scissors
The Process of making the Fall Pumpkin Wreath
Begin by arranging all of your pumpkins in a circle. Rearrange until you achieve the desired look for your wreath. I used 8 pumpkins in my project, but you can use more or less depending on what size you want your wreath to be.

Step Two
Glue all of the pumpkins together one at a time using a hot glue gun. I found it is easiest to push the pumpkins together on a flat surface so the backs of the pumpkins are all the same height. This is especially important if the pumpkins are different sizes. I also found it helpful to glue a bump in a pumpkin to an indent in the next pumpkin. They fit together well that way.
You can double check that your wreath is still coming together in the shape that you want in between gluing each pumpkin. This is done by simply arranging the pumpkins in the wreath shape again before gluing the next pumpkin.


Step Three
Glue the popsicle sticks onto the back of the wreath to give it more stability. After all of the pumpkins are glued together and it has dried, carefully flip the wreath upside down. Then, glue the popsicle sticks to the back of the wreath one by one. Glue each end of the popsicle stick to a different adjoining pumpkin so that the area where they were glued is more secure.
Try to glue the popsicle sticks in a way that they cannot be seen from the front of the wreath. The idea is to not be able to tell that there is reinforcement when it is hanging up.


Step Four
Attach the twine that will be used to hang the wreath.
First, decide how long you want the twine to be. This will be determined by how far down you will want the pumpkin wreath to hang on the door. Then, cut the twine to the desired length.
Next, use popsicle sticks to secure the twine in place. I ended up gluing two popsicle sticks together to create a wider base. Hold the ends of the twine down where you want it placed and add a dollop of hot glue there. Then, quickly place the popsicle stick on top and hold it down until it dries.

Voila!
And there you have it! A very simple and easy fall pumpkin wreath to hang on your door and enjoy all Autumn long.

I hope you enjoy making this project. Thank you for choosing us to help make you house feel like home!
More Fall Posts!
Pinecone Ghost Craft for Kids and Toddlers
Easy and Affordable DIY Fall Pumpkin Wreath

DIY Fall Pumpkin Wreath Instructions and Video Tutorial. Learn how to make this affordable and easy pumpkin wreath which will be sure to liven up any Autumn space.
Materials
- Small decorative pumpkins
- Popsicle sticks
- Twine
Tools
- Hot glue gun
- Hot glue sticks
- Scissors
Instructions
- Gather your pumpkins and place them in your desired shape.
- Hot glue each of the pumpkins to each other once at a time. It works best to glue a dimple in one pumpkin to a rounded part of the next pumpkin. You can reassess the shape of your wreath in between gluing each piece to ensure the desired shape remains.
- Once dry, flip the pumpkin wreath upside down and hot glue popsicle sticks to the back to secure the pumpkins together. You will glue each side of the popsicle to different connecting pumpkins. Then you will glue one end of the next popsicle stick on top of the first one and the second end of the popsicle stick to the next connecting pumpkin. The idea is to give the wreath more stability. You want to try to keep the popsicle sticks from being visible to the front of the pumpkin wreath as much as possible.
- Once all of the stabilizing popsicle sticks have been added and the glue has dried, you will make the hanging loop for the wreath. To do this, cut a piece of twine to your desired length. The desired length will depend on how far you want the wreath to hang when it is hung up.
- Hot glue each end of the twine to the popsicle sticks on the back of the wreath. Then, while the glue is still hot, place another popsicle stick on top of the twine to secure it in place. You will need to press the popsicle stick into place until the glue dries. If you want a wider loop, you may need to glue two ends of different popsicle sticks together before you place them on top of the twine. If choosing that route, gluing the two popsicle sticks should be done first because you will need to work quickly to place the securing popsicle sticks onto the twine while the glue is still hot.
- Once everything is dry, hang up the wreath in your desired location and enjoy its beauty all Autumn long!
Notes
- If the pumpkins you choose are different sizes, try to secure them together on a flat surface like a table so that the bottoms of the pumpkins remain even. This will make it easier to attach the securing popsicle sticks.
- Feel free to use any color or fabric of pumpkins that work best for your home to make it unique to you!
Pin it for later


This is such a cute fall craft! Seems like it could be a fun craft for older kids to participate in as well!
Thank you! I agree that kids would enjoy it too 🙂
I love it! So cute.
Thank you so much!
I thoroughly enjoyed reading this article—it was concise
and well-researched! The site looks professional and inviting.
Thank you very much! I really appreciate that compliment!
I really enjoyed this article—it’s both informative and engaging.
The site is a great place for valuable insights.