
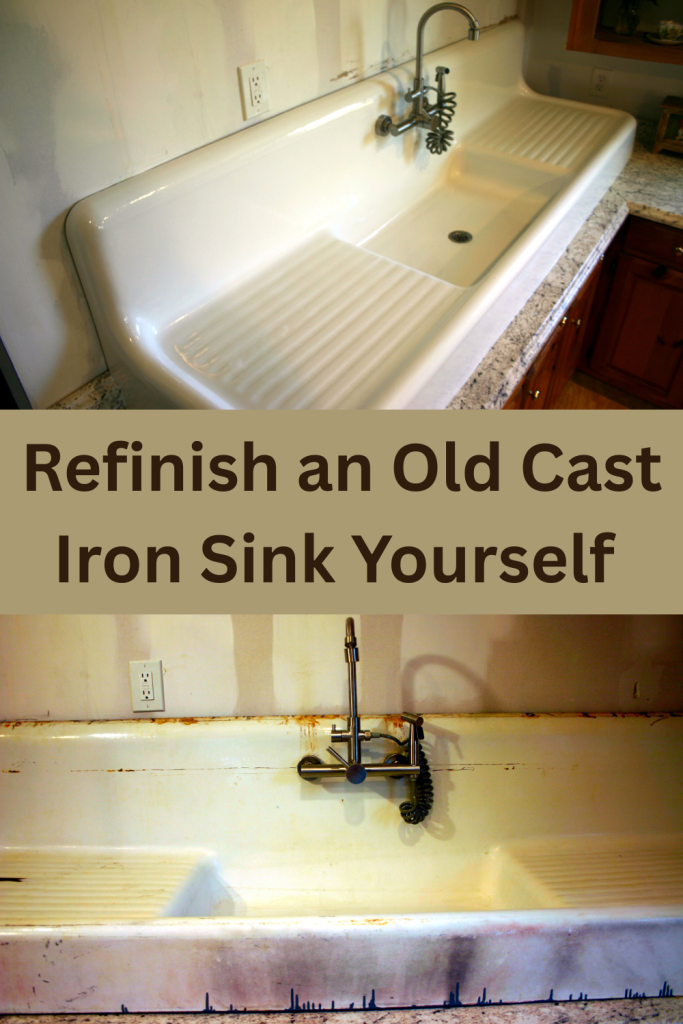
Learn how to restore an old cast iron sink at home! Return the beauty of this timeless sink with a few tools and a lot of elbow grease. Washing your daily dishes can become a lot more enjoyable with this rewarding DIY project!
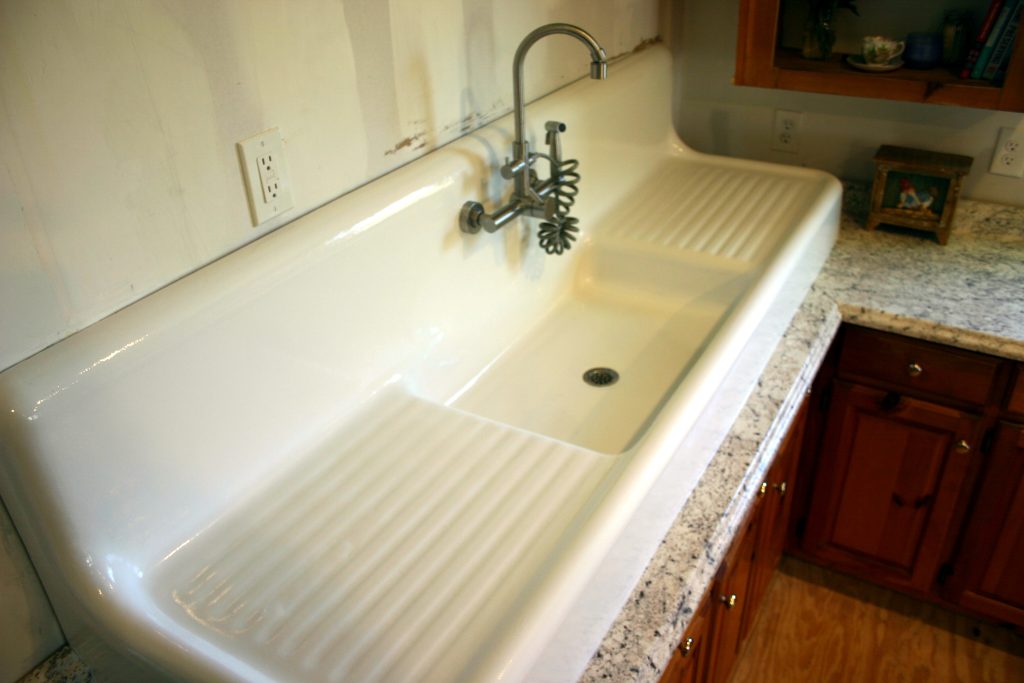
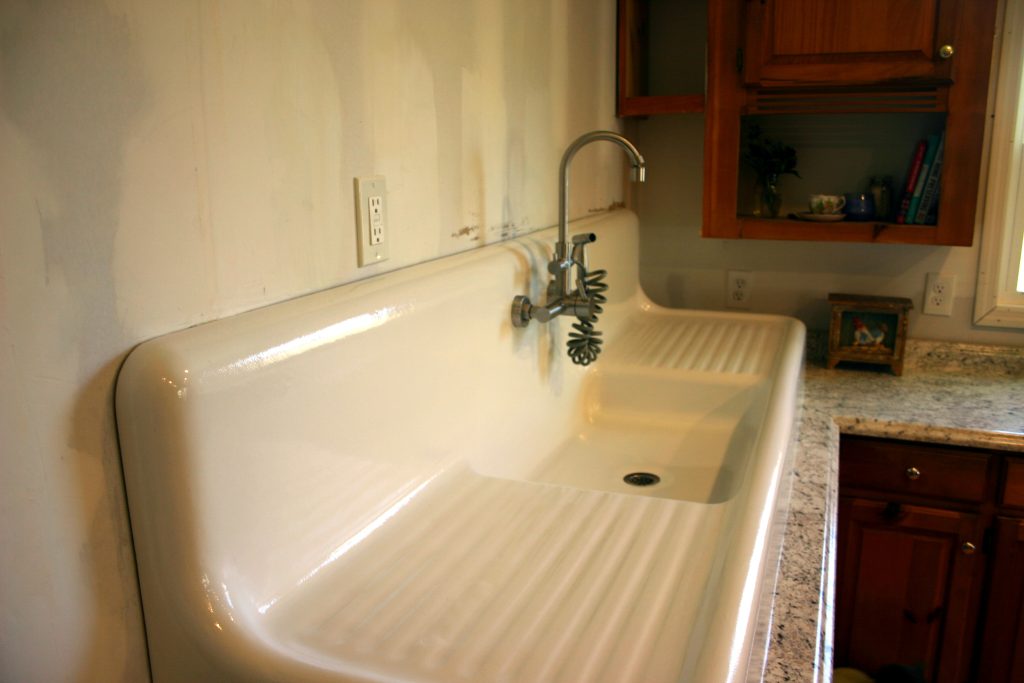
I have always marveled at and been drawn to antique sinks. There is something so functional and beautiful about them that is hard to resist. So, when it was clear that our kitchen needed to be gutted and rebuilt, I allowed my mind to wander to the possibility of owning my own antique cast iron kitchen sink.
I knew that I would have to restore it myself to save money, so I began researching to figure out how to take on this project. After some time, and a good deal on Facebook Marketplace, I was able to begin my antique sink restoration journey!

YouTube Video Restoring an Old Cast Iron Sink
Watch this YouTube video for in-depth visual instructions to repair and install your own cast iron sink!
How to Find an Old Cast Iron Sink
Firstly, I had to locate the right sink. I knew that I wanted a large, double drainboard antique kitchen sink. I ended up finding one on Facebook Marketplace. It was in pretty good condition and a decent distance from our house, so it fit our needs well. Here are some other tips for finding an old cast iron sink:
- Talk to any contractors or blue collar employees you know. I have met several people who will remove an antique sink from a home they are working on and have it just sitting in their garage, waiting for some lucky person to come pick it up.
- Check antique and restoration stores. Old sinks found here might be in better quality. So, if you’re looking to work less, this could be a good option.
- Check junk yards. Old things are thrown away all of the time. You might just get lucky!
- Facebook Marketplace. If you’re not finding any luck, try widening your radius. It might be worth it to drive a little farther for the right sink. Additionally, be sure to save options that seem to expensive. You will be notified when the price drops, so you can snag it quickly!
Materials to Restore an Old Cast Iron Sink
This post contains affiliate links for your shopping convenience, which means I make a small commission at no extra cost to you . Read the full disclosure here.
I was able to round up links for all of the materials I used to repair my cast iron sink. A list of all of the materials can be found Here!
For easy, specific links, here are all of the materials I used:
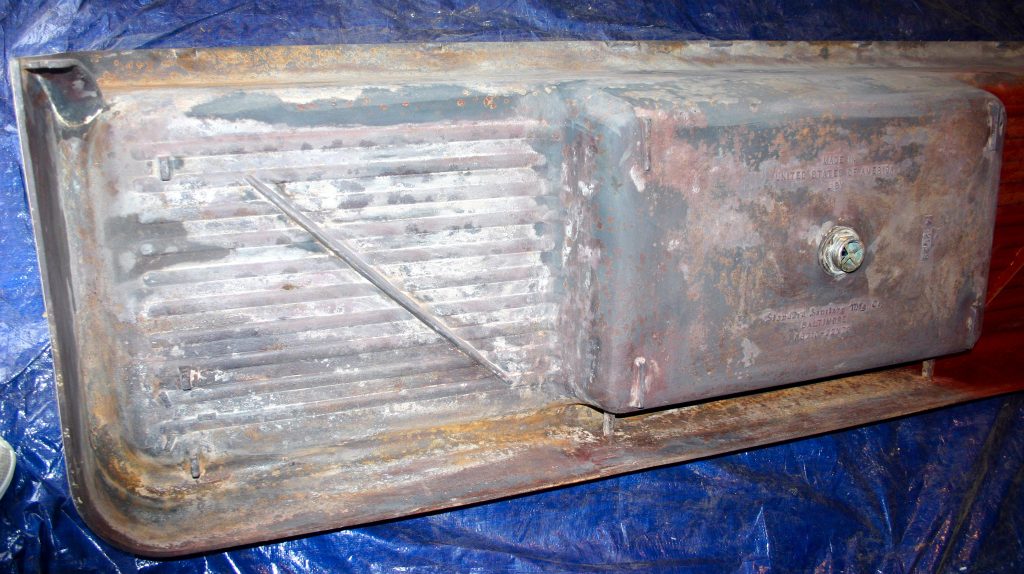
How to Restore an Old Cast Iron Sink: The Back
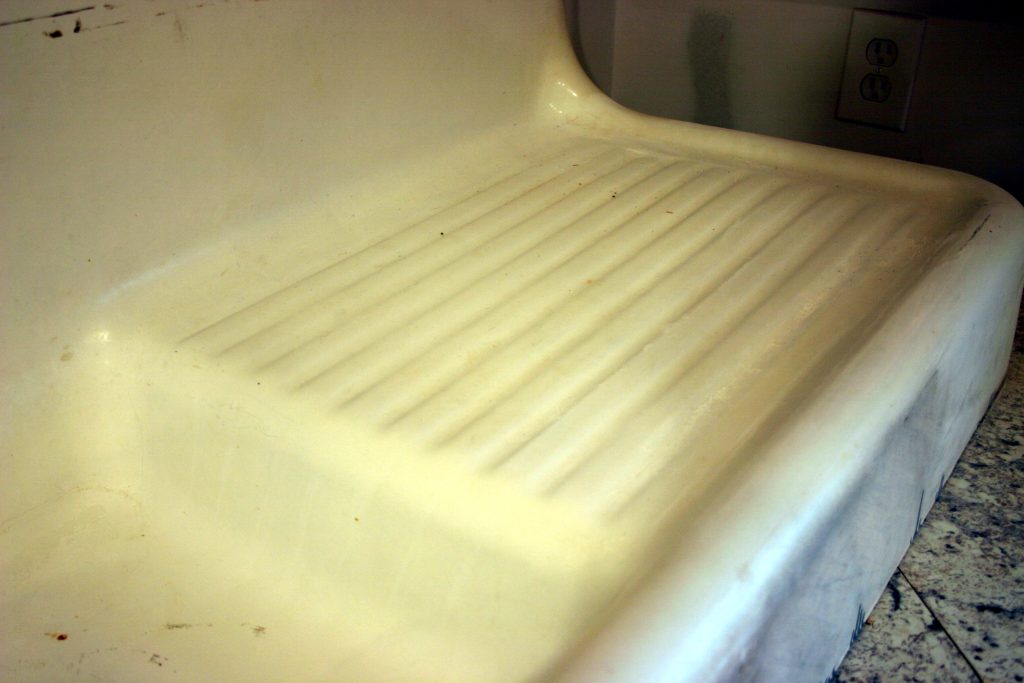
If you’re acquiring a used cast iron sink, chances are high that there will be a bit of rust, especially on the bottom of the sink. Removing the surface rust is an important step in restoring the old cast iron sink, even on the bottom of the sink that no one will see. We want this sink to last many more years and removing the rust and coating it with paint will help it do just that.
Remove the Rust
- Use a gel or spray to help quicken the process of the rust removal. I used this Rust Dissolver Gel and it worked well. I highly recommend using this product early on in the process. I forgot that these products existed and spent way too much time unnecessarily sanding.
- Use wire brushes to remove the rust by hand. There are some grooves in the sink that will be best reached by a wire brush like these. Wire brushes work very well at removing the surface rust.
- Although it is not necessary, a drill with wire brush attachments is very handy in the sanding process. The drill helps sanding go a lot quicker than doing the entire sink by hand. This is especially true of the double drainboard sinks which are between 6-7 feet long.
- Be sure to use safety materials when sanding the sink. Rust will be flying everywhere, so protect your airways and eyes by wearing a face mask and safety glasses. Gloves and kneepads can also be helpful, depending on whether or not your are working on the floor. If you are able to prop your sink onto a surface like saw horses, then that is ideal.
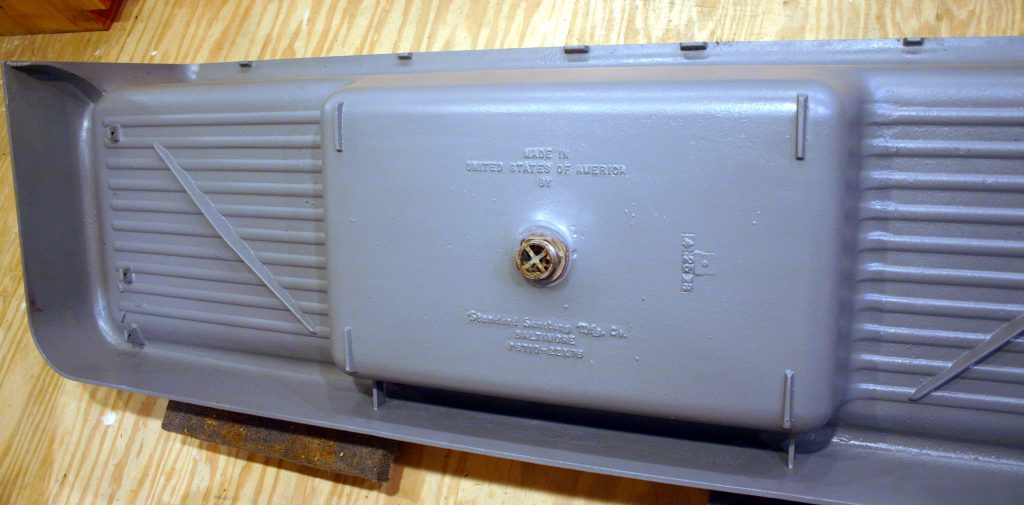
Coat the Sink
After everything is sanded, coat the bottom of the sink with paint to prevent any rust from forming in the future. I used a Rustoleum primer and paint. These were spray paints, so the application was very quick and easy. I used about 2-3 bottles of each to coat the sink. I recommend doing one coat of the primer and two coats of the paint.
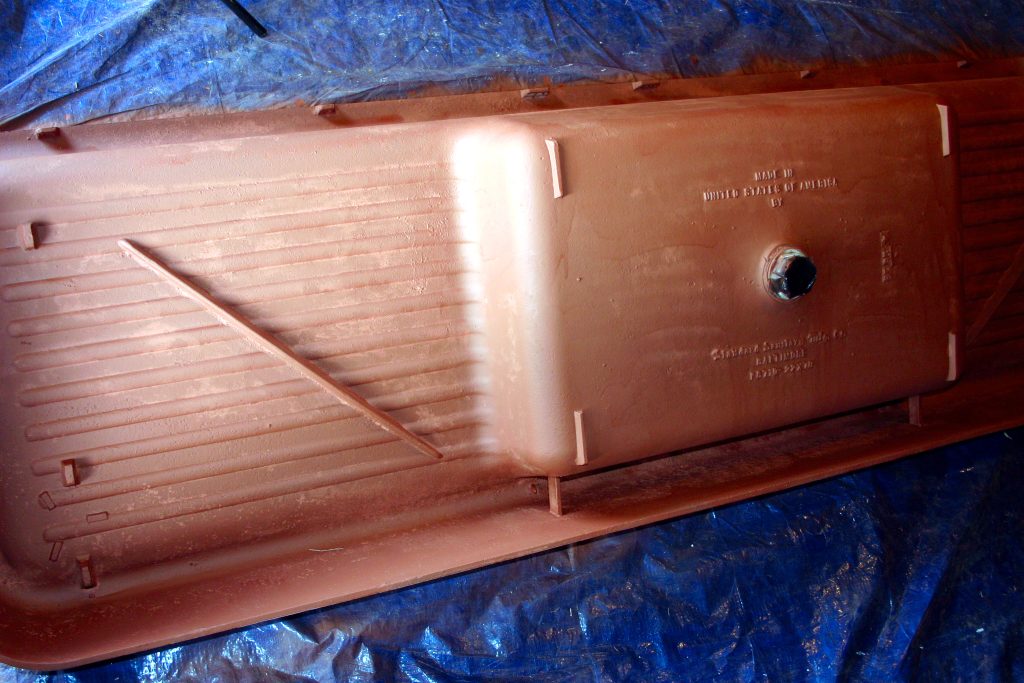
Tip for using spray paint! Spray the paint in short, quick strokes. This will help by both producing less streaking and preserving the product so that less can be used.
How to Restore an Old Cast Iron Sink: The Front
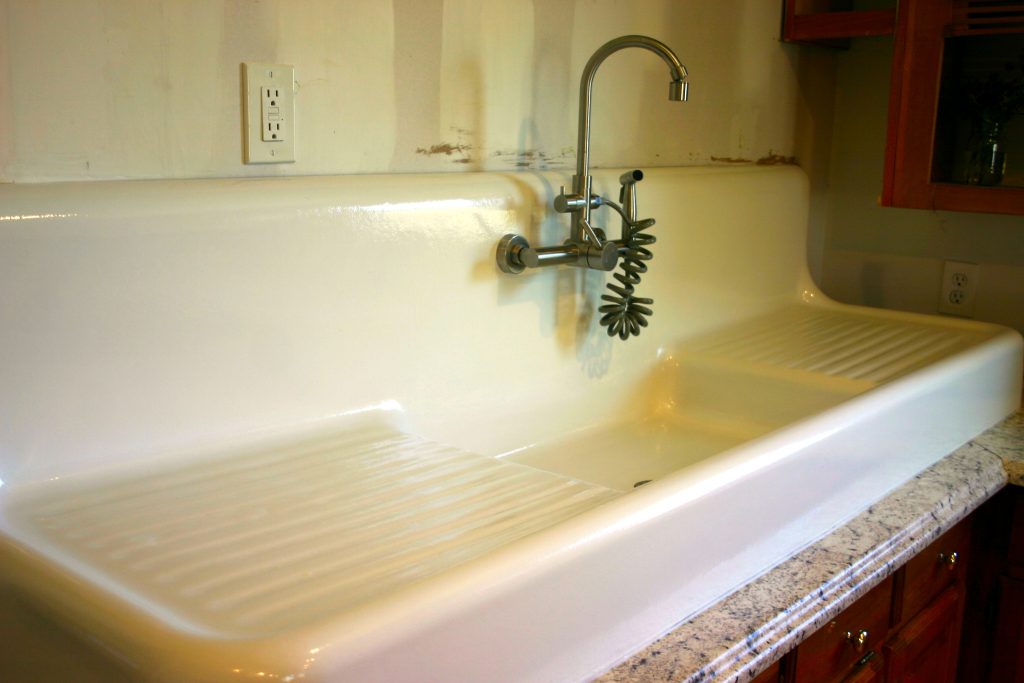
Now for the pièce de résistance: the front of the sink! There are a few steps that need to be taken to refinish the sink. Most of the steps are in the Bathworks Refinishing Kit. This kit is used to repair tubs and touch up porcelain, which can work on this porcelain sink as well. The size of your sink will depend on the size kit you get. I do recommend getting enough enamel for two coats, at least in the basin of the sink, to minimize chips.
Sanding
Start by sanding the sink to remove any surface contaminants. This can be done by hand, but is made easier with a sander. Use a coarser grit in the beginning. I started with 60 grit sandpaper to remove all of the surface rust, spray paint that had leaked onto the front, and other contaminants.

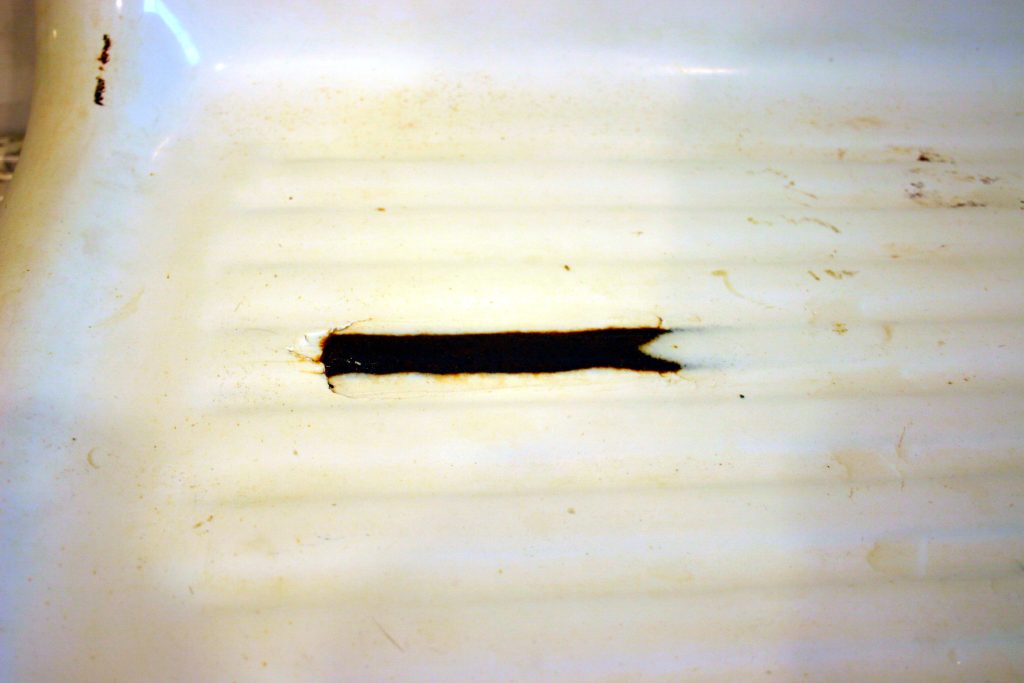
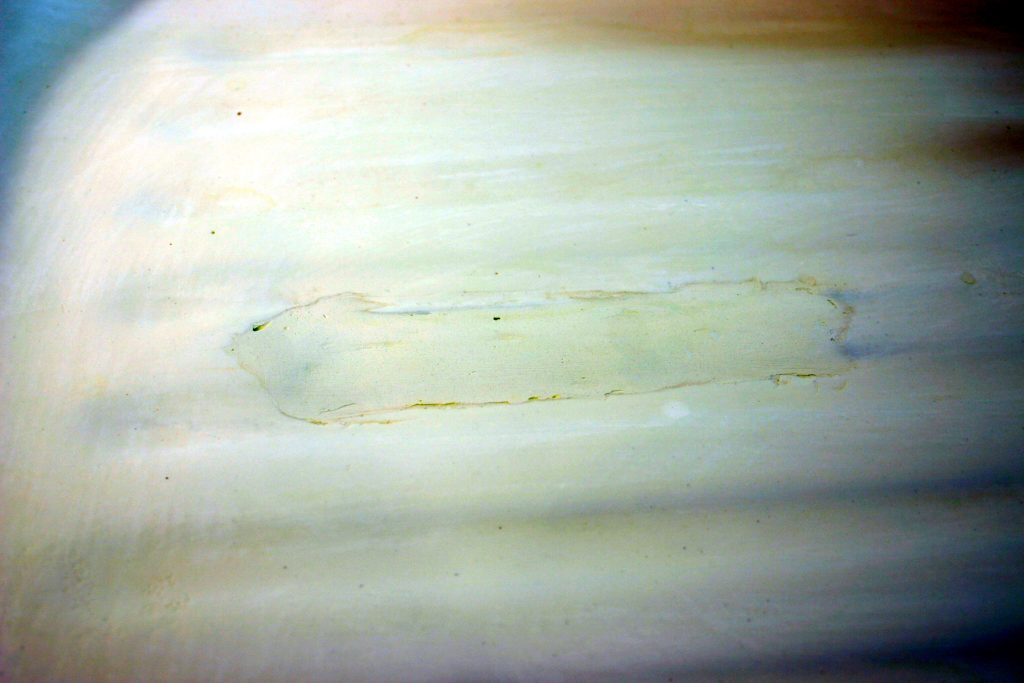
Fixing Repairs
The Bathworks kit comes with chip repair materials. Mix together the chip filler and the tube of paint provided. Then, fill in any sections that need repairs, such as chips, dings, and rusted areas that no longer have enamel on them. The mixture hardens, so be sure that you are ready to use it immediately after mixing the ingredients together. Also, be sure to use the protective equipment, such as the gloves, provided in the kit.
Etching
Before using the etching paste, I sanded the entire sink again using 120 grit sandpaper. I also put painter’s tape around the faucet, countertop, and covering the drain of the sink. This is to prevent the chemical etcher from getting on surfaces that it could damage.
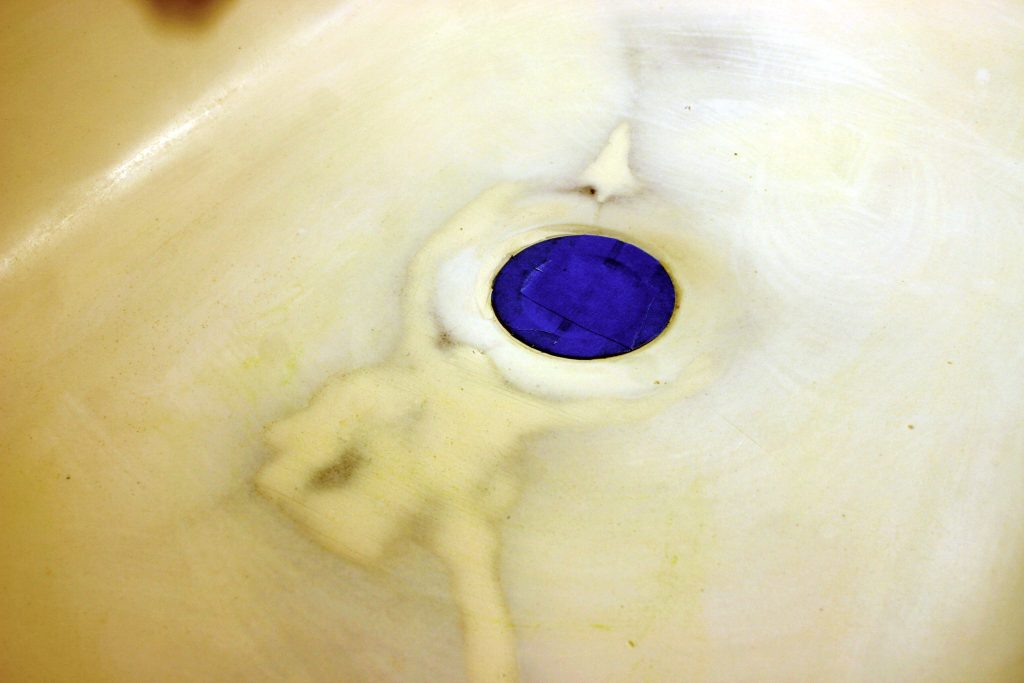
Again, be sure to wear proper protective equipment when using the chemical etcher, especially gloves and a breathing mask, as the fumes are rather strong. Follow the instructions to shake the chemical etcher and apply it to the entirety of the sink with the provided sponge. I used the entire bottle of etching paste on my 6.5′ sink.
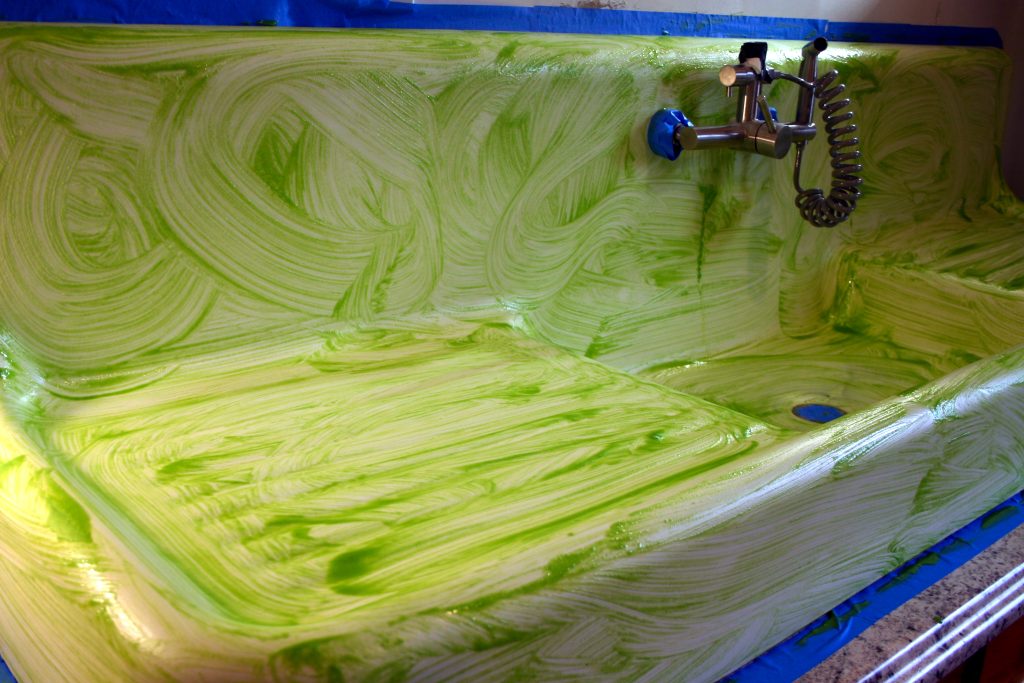
Painting
Now to the good part! Painting the sink with the porcelain enamel coating! This paint the other necessary materials for this step are also provided in the Bathworks Refinishing Kit. Once again, be sure to use any recommended protective equipment and open windows to allow air flow, as the paint also has a strong scent.
- Wipe down the sink with the sticky tack cloth provided to remove any residual dust or debris.
- Coat the entire sink with the liquid primer using a paper towel.
- Mix the porcelain paint and the hardener together in the cup provided. Stir it and let it sit for the time recommended on the instructions.
- Paint the sink using the tray pan and foam roller provided. If a second coat is needed or desired, it can be applied immediately after the first coat without needing to wait for it to dry. The paint is good for about 2-3 hours after mixing it together.
Touching Up an Old Cast Iron Kitchen Sink
Some things can cause the enamel to chip, especially heavy or sharp things falling onto it. Touching up is pretty easy. Simply do another light sanding and follow the instructions in the Bathworks Repair Kit again. Although, in this case, a smaller repair kit would be appropriate. For example, just this chip repair kit or this refinishing kit might be needed depending on your needs.
More Home Renovation Projects!
Thank you for following along on our home renovation journey! Keep reading more about the ways we turn this house into a home here:
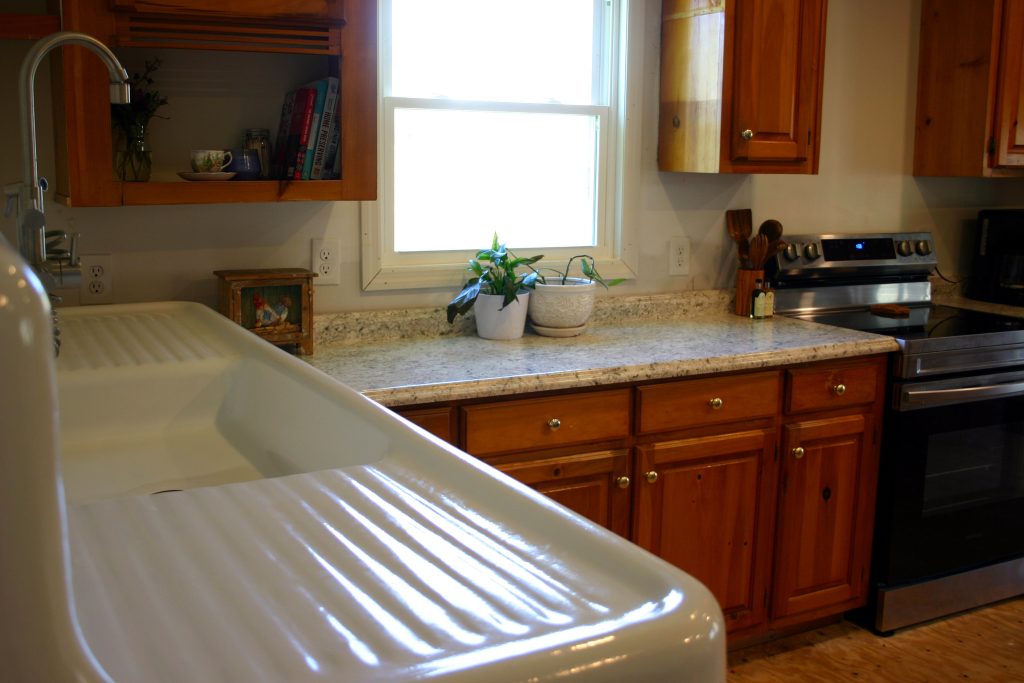
Our Full Affordable Kitchen Renovation Tutorial
Thank you for stopping by! Be sure to keep following along for more ways to make your house a home!
Pin for Later!
I know you put a lot of blood sweat and tears into this project. It looks amazing!
Thank you so much! It did take a lot of work, but I love the results!